Provisioning Role-Based Access
How to provision Role-Based Access in S3
Last updated
How to provision Role-Based Access in S3
Last updated
The most secure method for connecting data from your AWS account to Deep Lake is using Federated Credentials and Role-Based Access, which are set up using the steps below:
1. Login to the AWS account where the IAM Role will be created and where the data is stored.
2. Go to the IAM page in the AWS UI, which can be done by searching "IAM" in the console and locating the IAM page under Services.
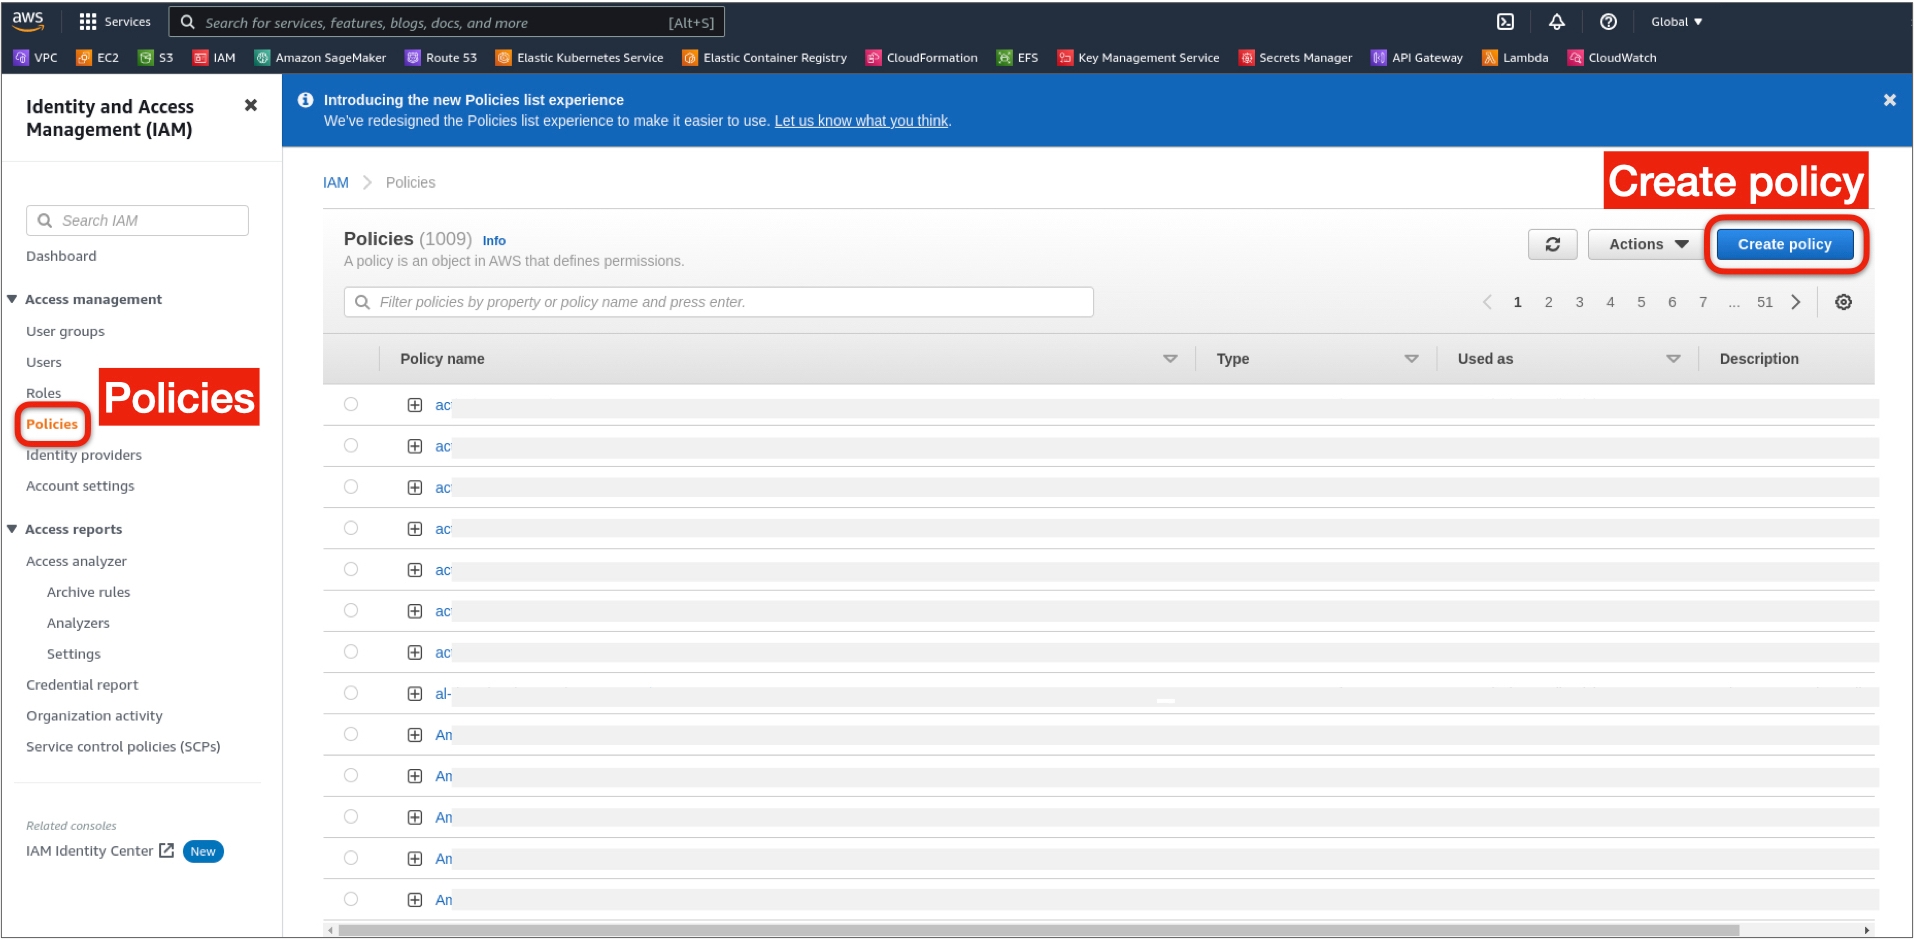
3. In the left nav, open the Policies under Access management and on Create policy on the right.
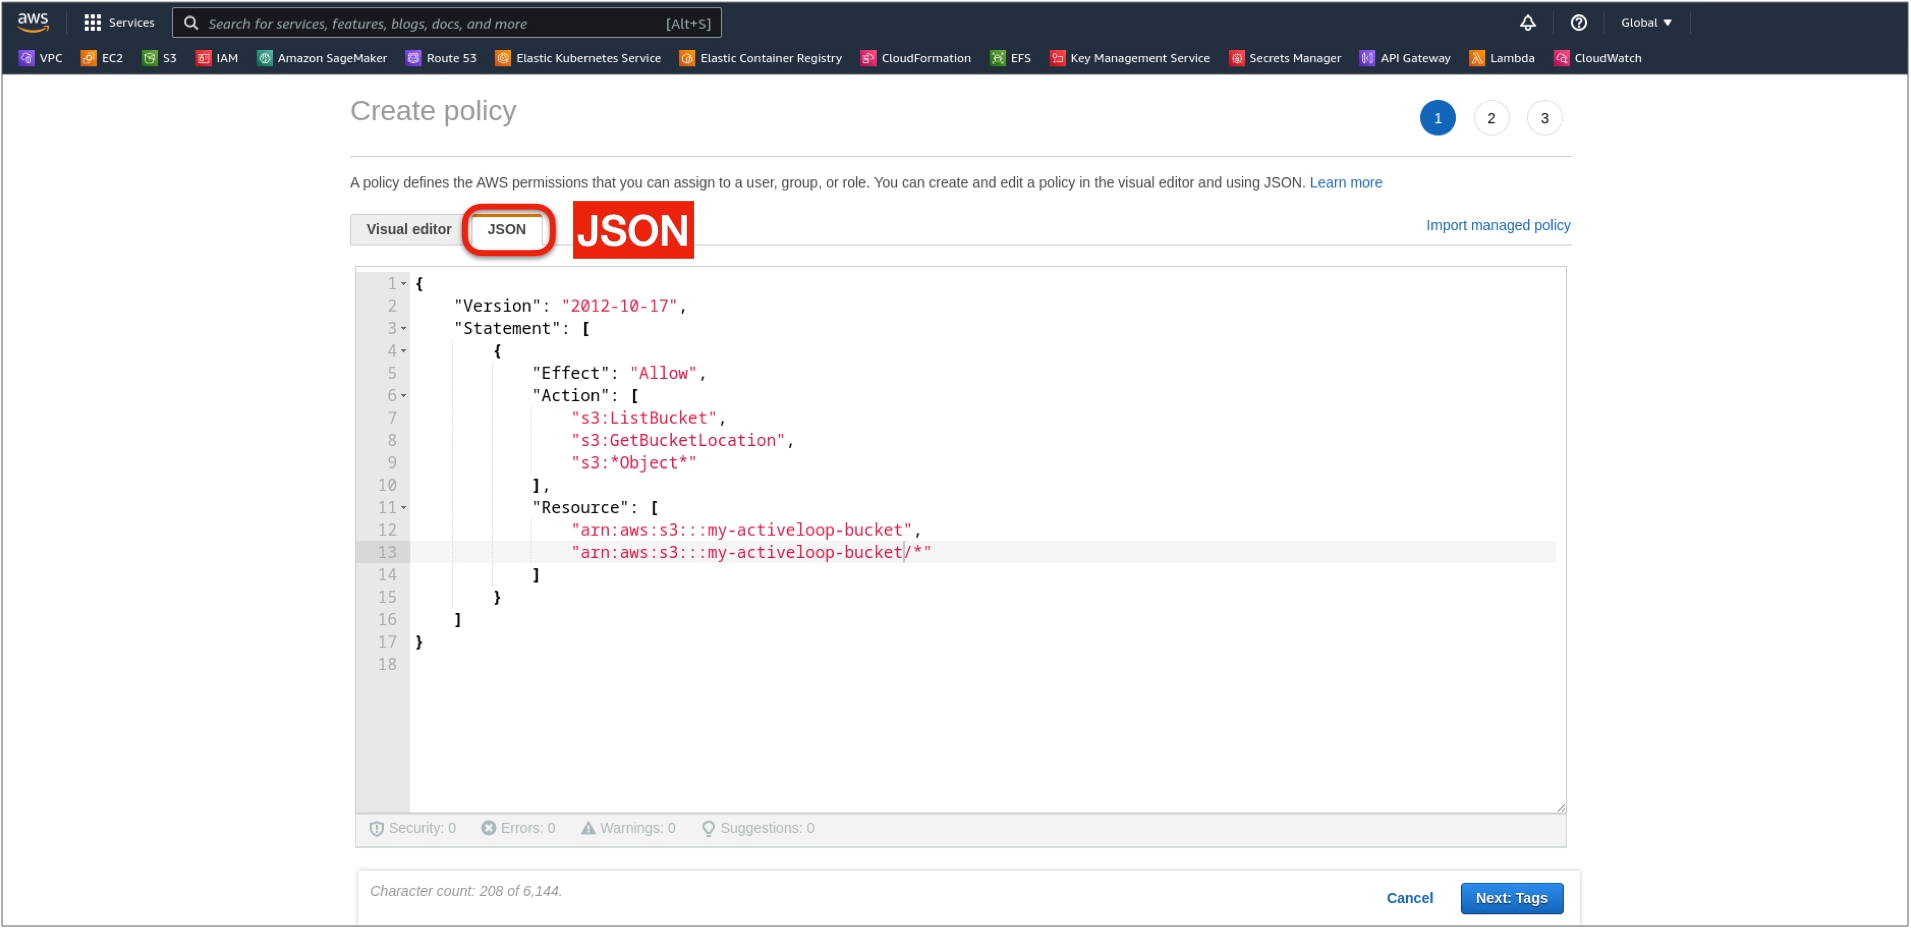
5. Select the JSON tab instead of Visual editor.
6. Replace the code in the editor with the code below. Replace BUCKET_NAME with the bucket names for which you want to grant role-based access:
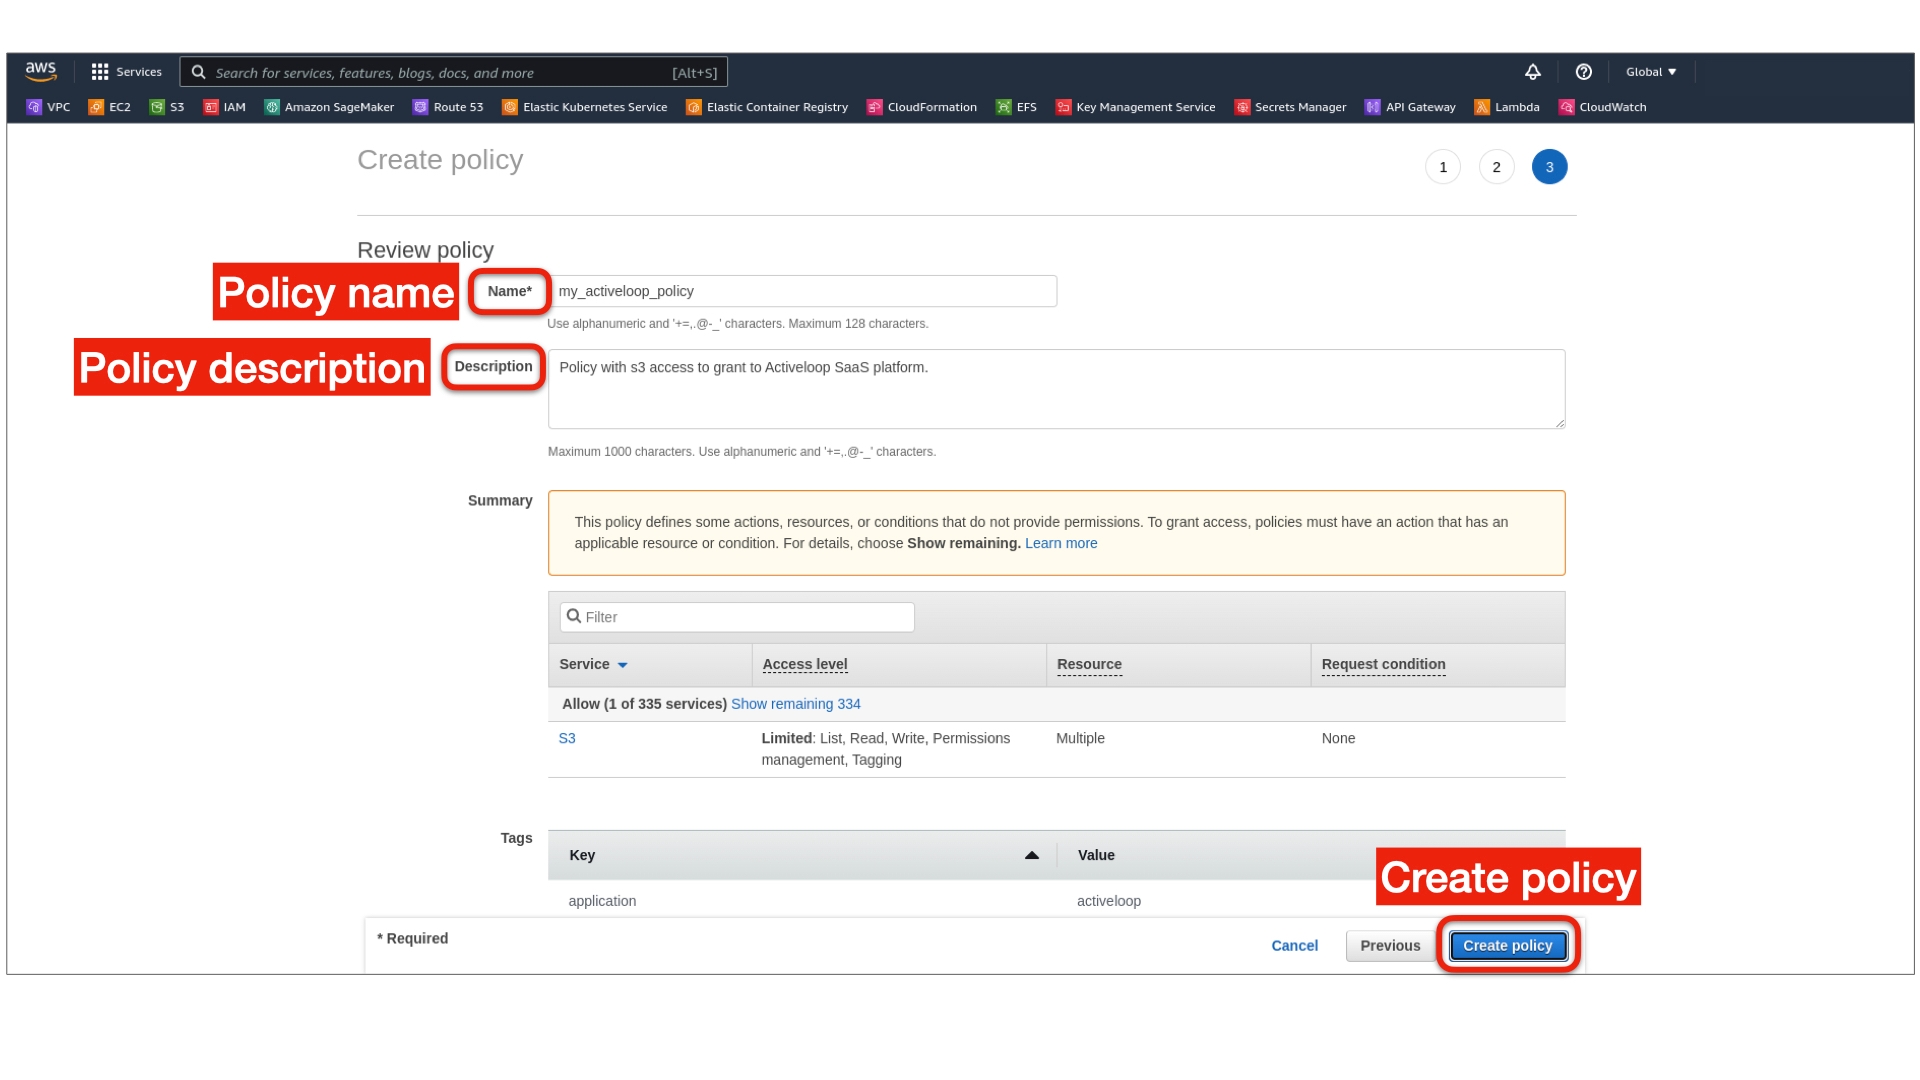
7. On the bottom right, click Next: Tags (create tags if needed) and Next: Preview, enter the policy name and description, and click Create policy
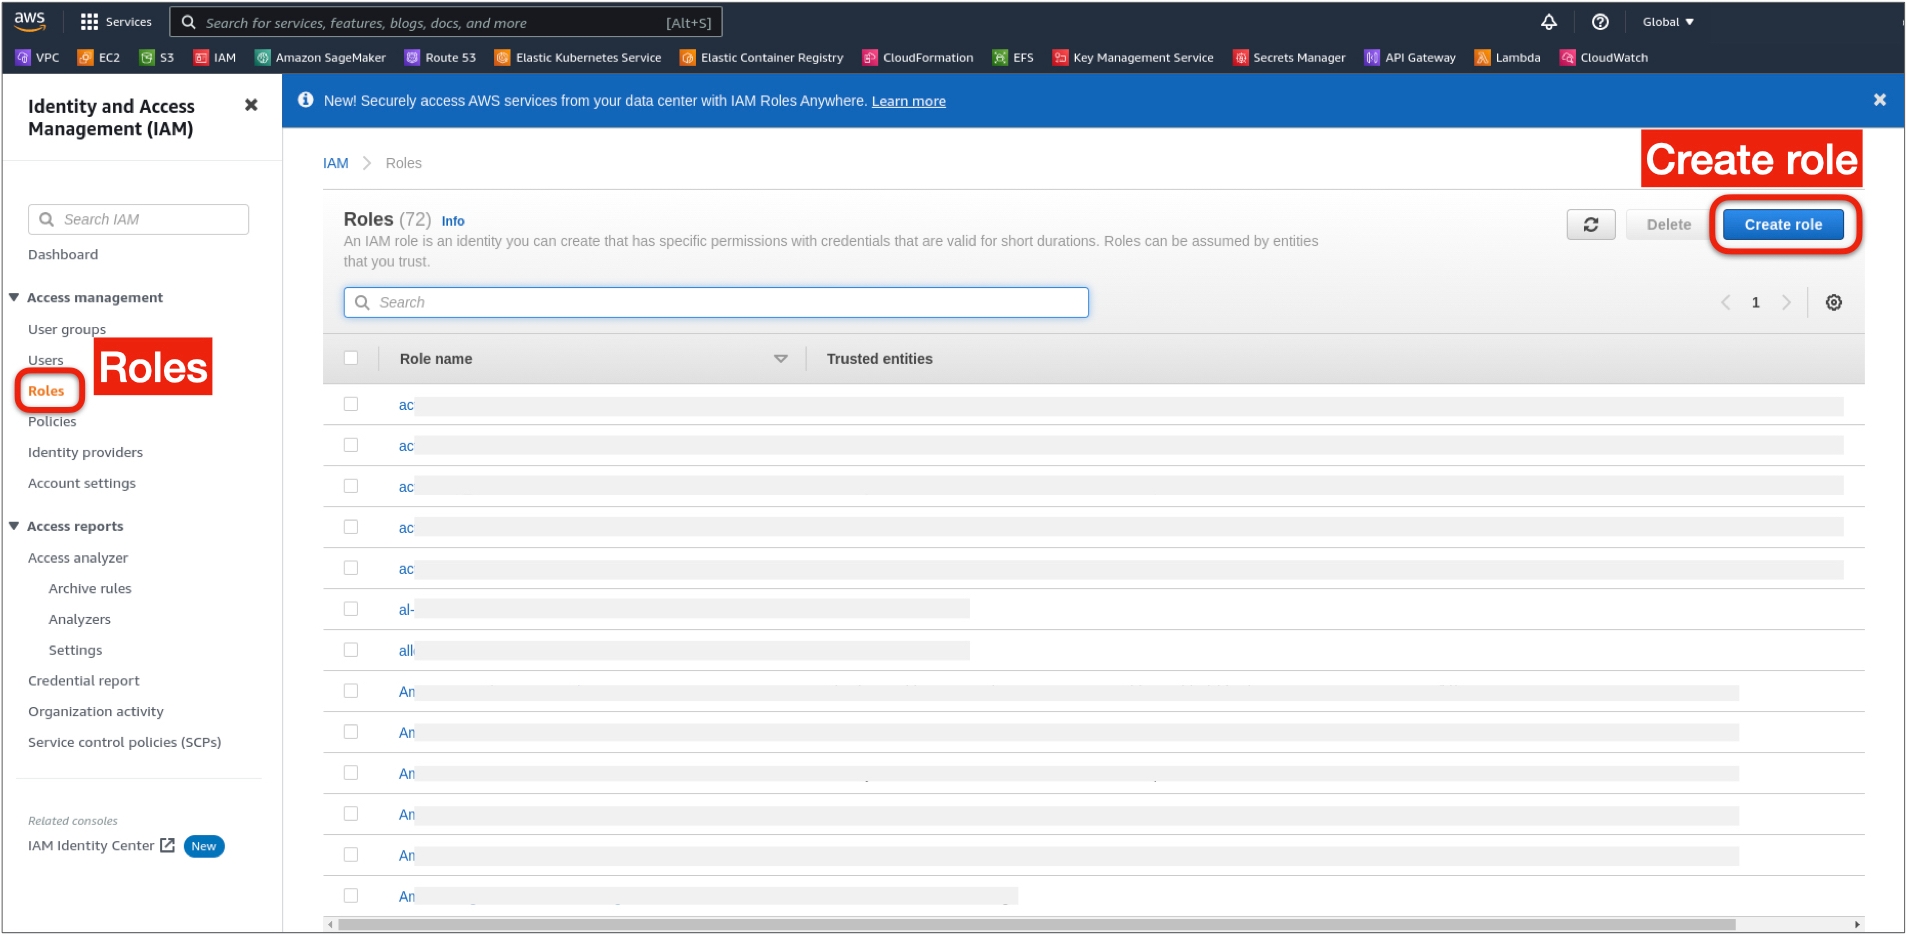
1. On the IAM page, in the left nav, open the Roles under Access management, and click Create role on the right.
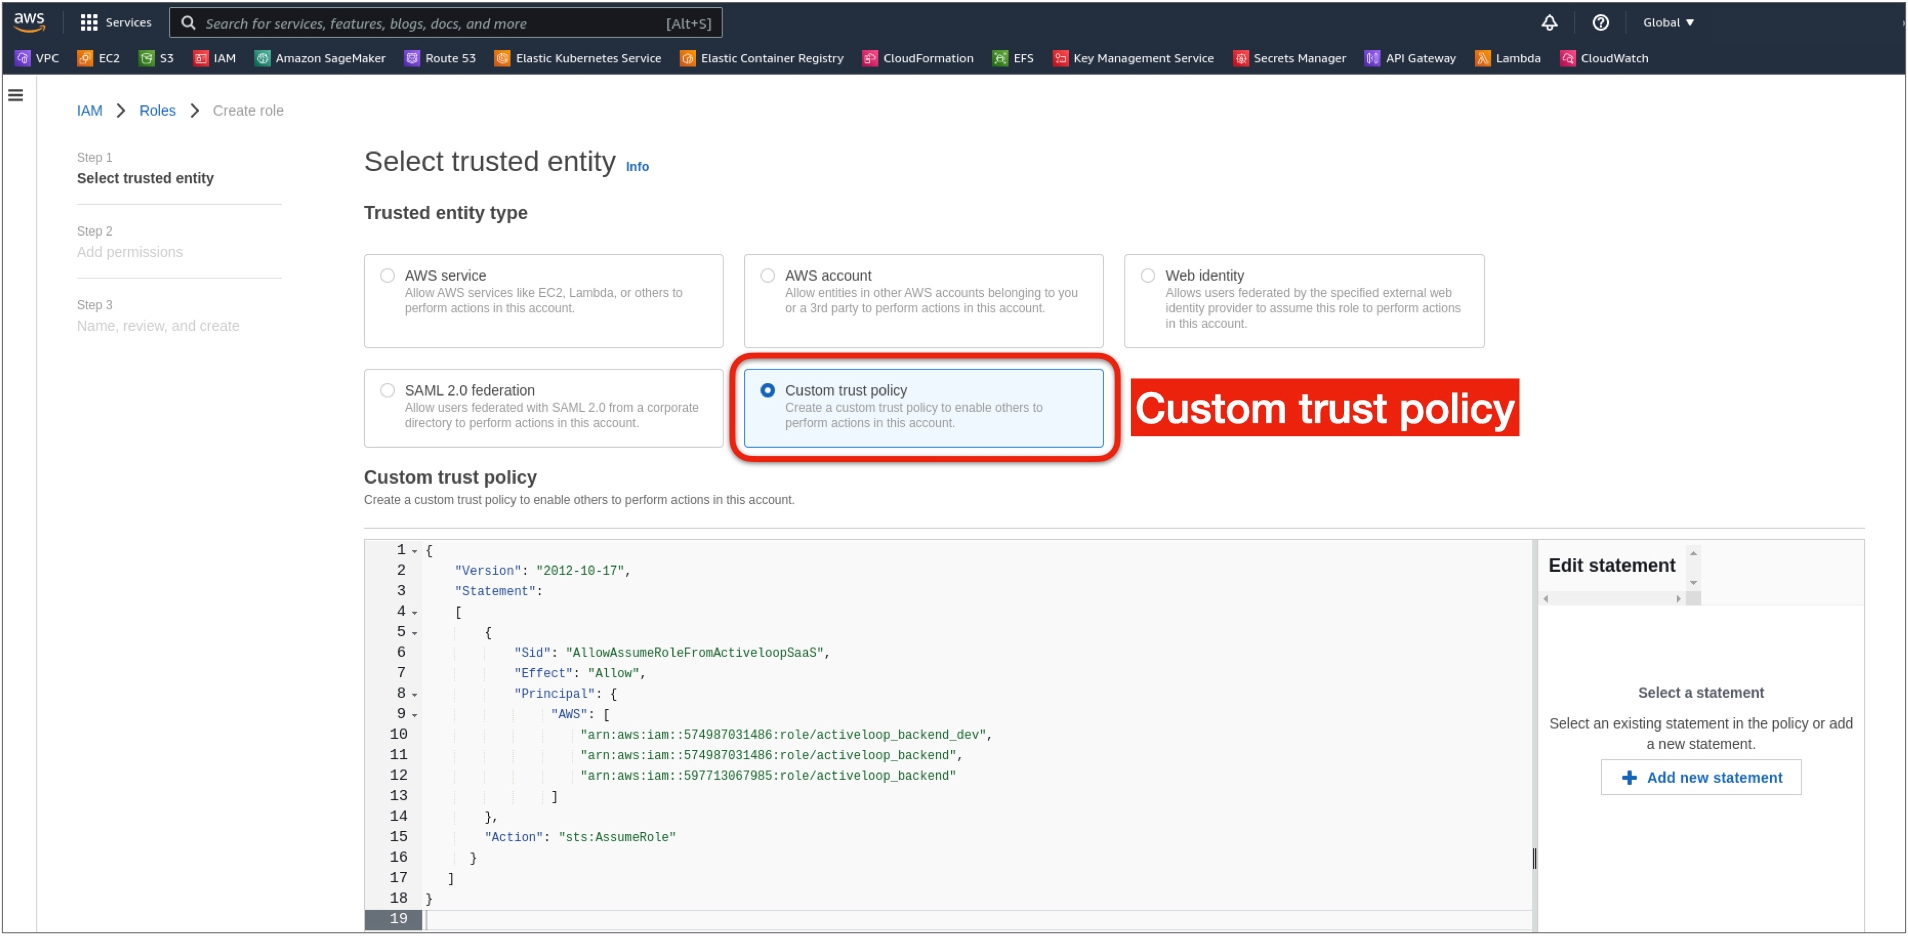
3. Select Custom trust policy from the list of options.
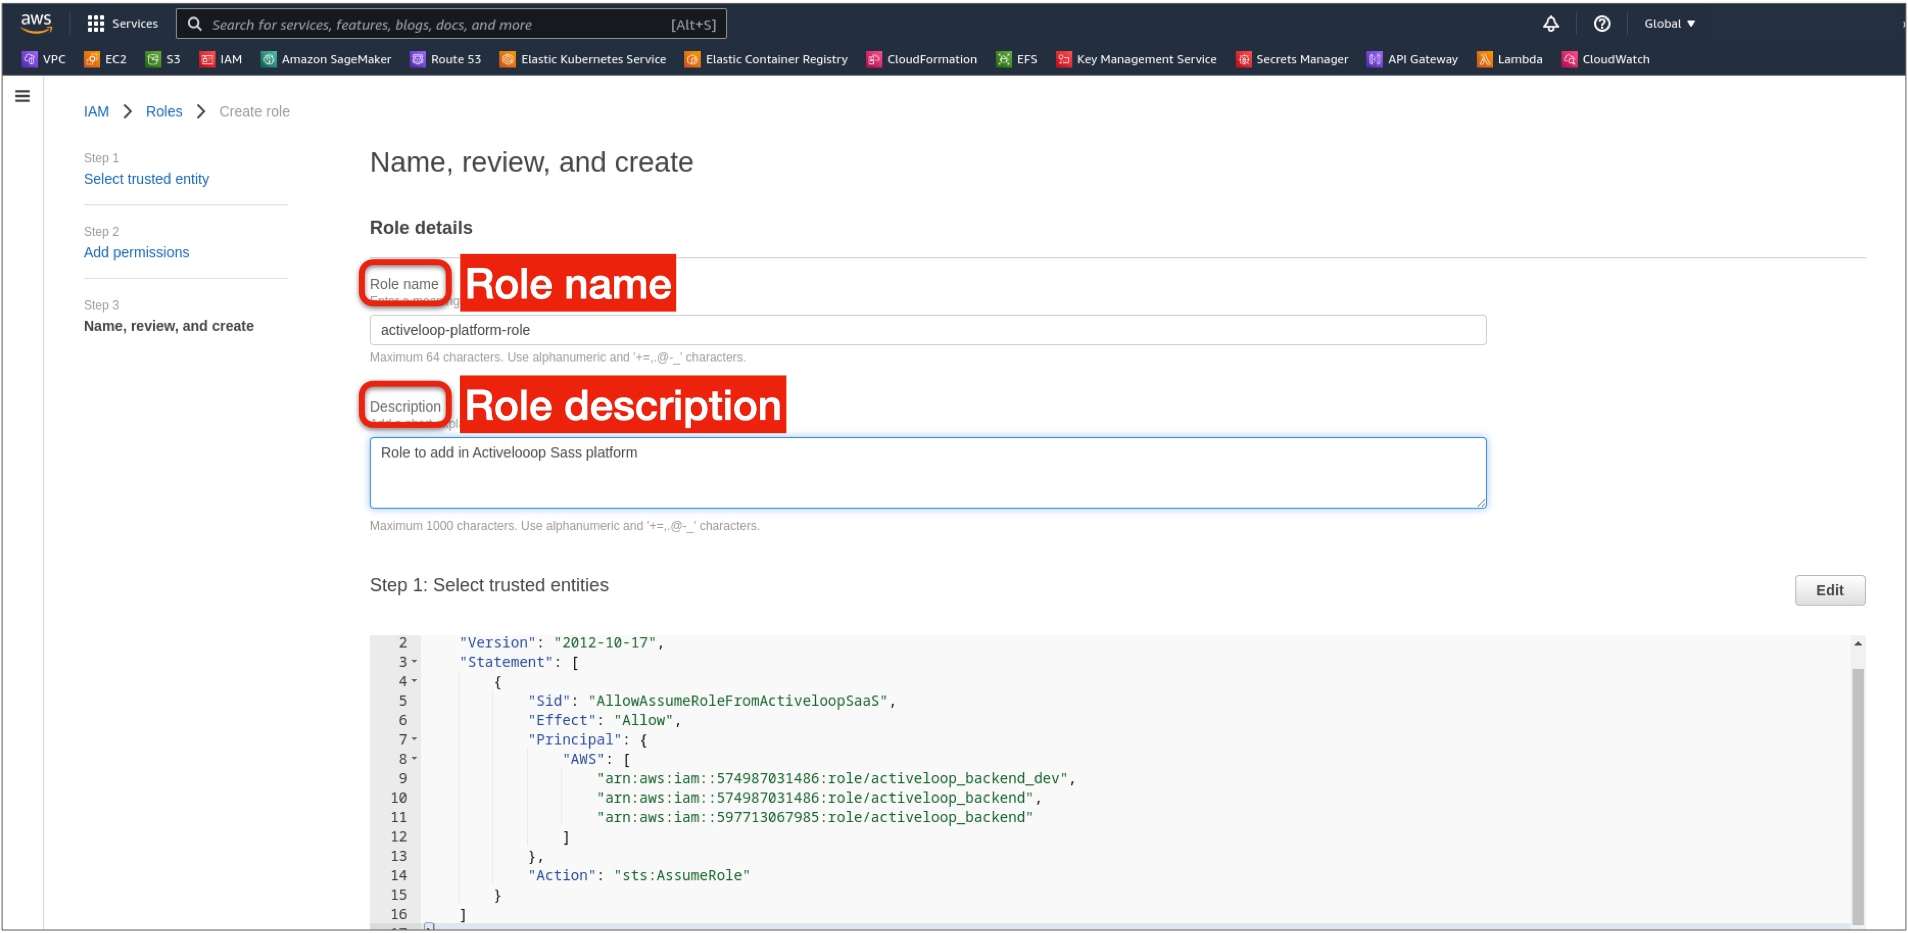
4. Replace the policy definition with the code below and click Next
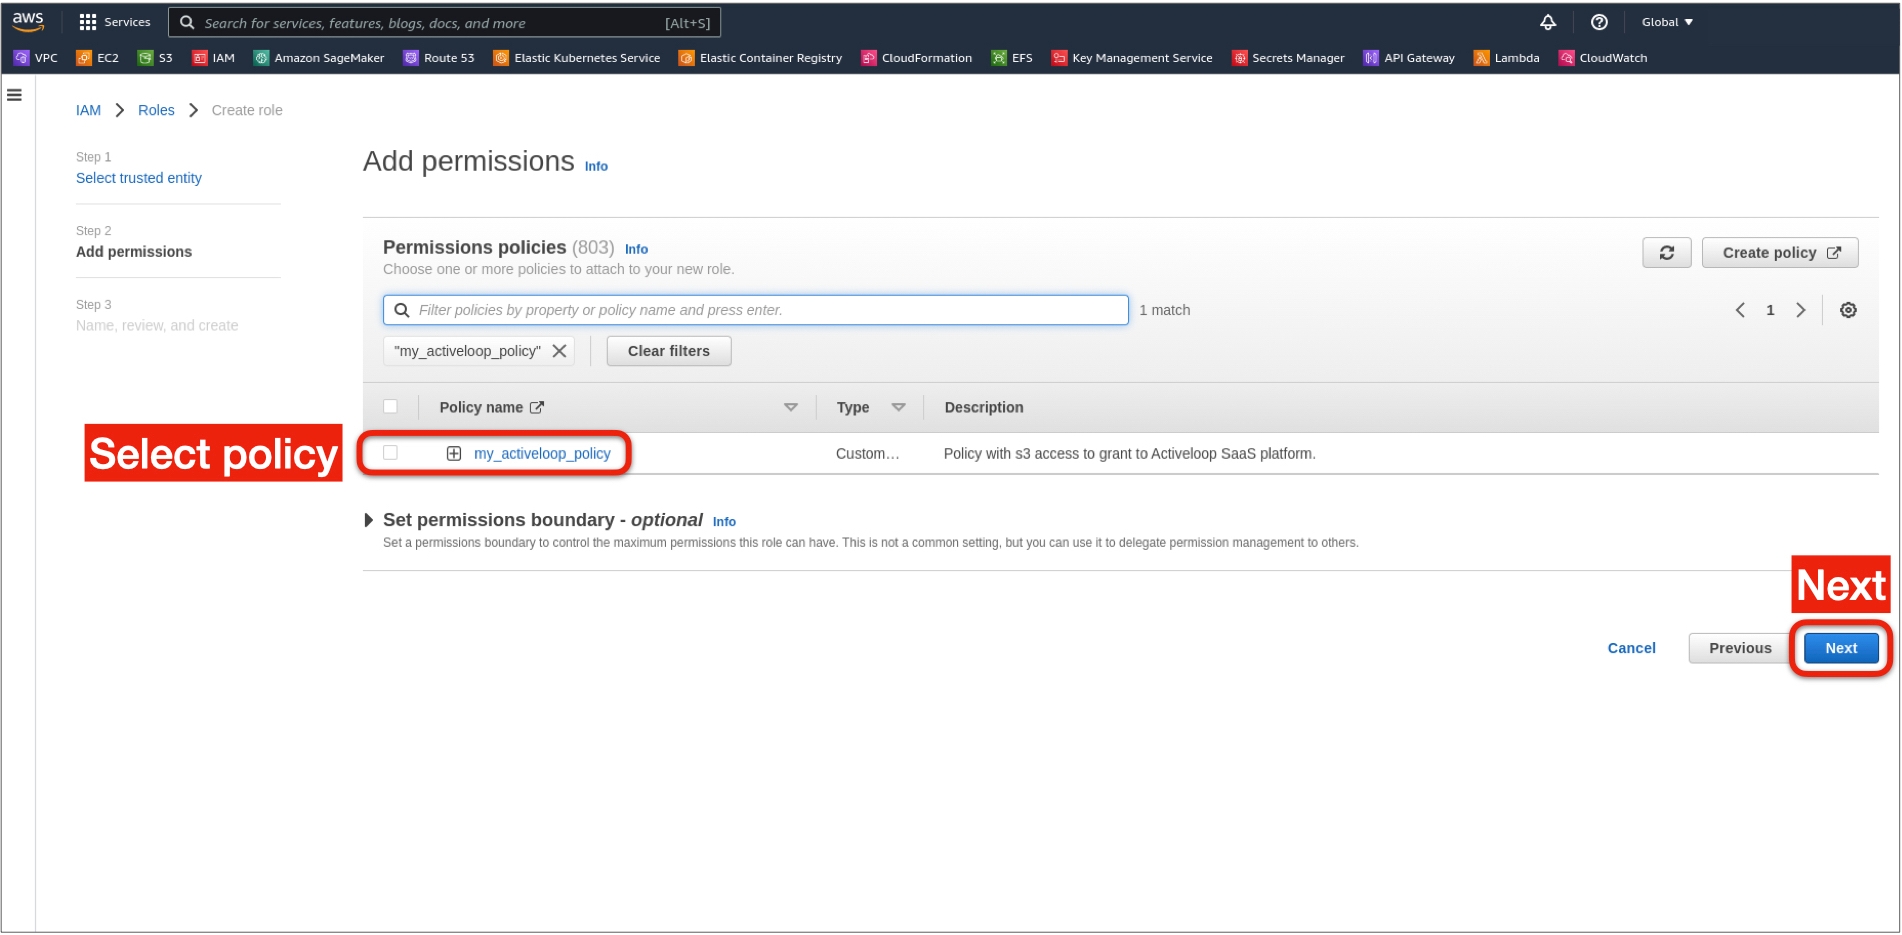
5. From the provided policy list, select the previously created policy from Step 1 and click Next
6. Set the name and description for the role and click Create role at the bottom.
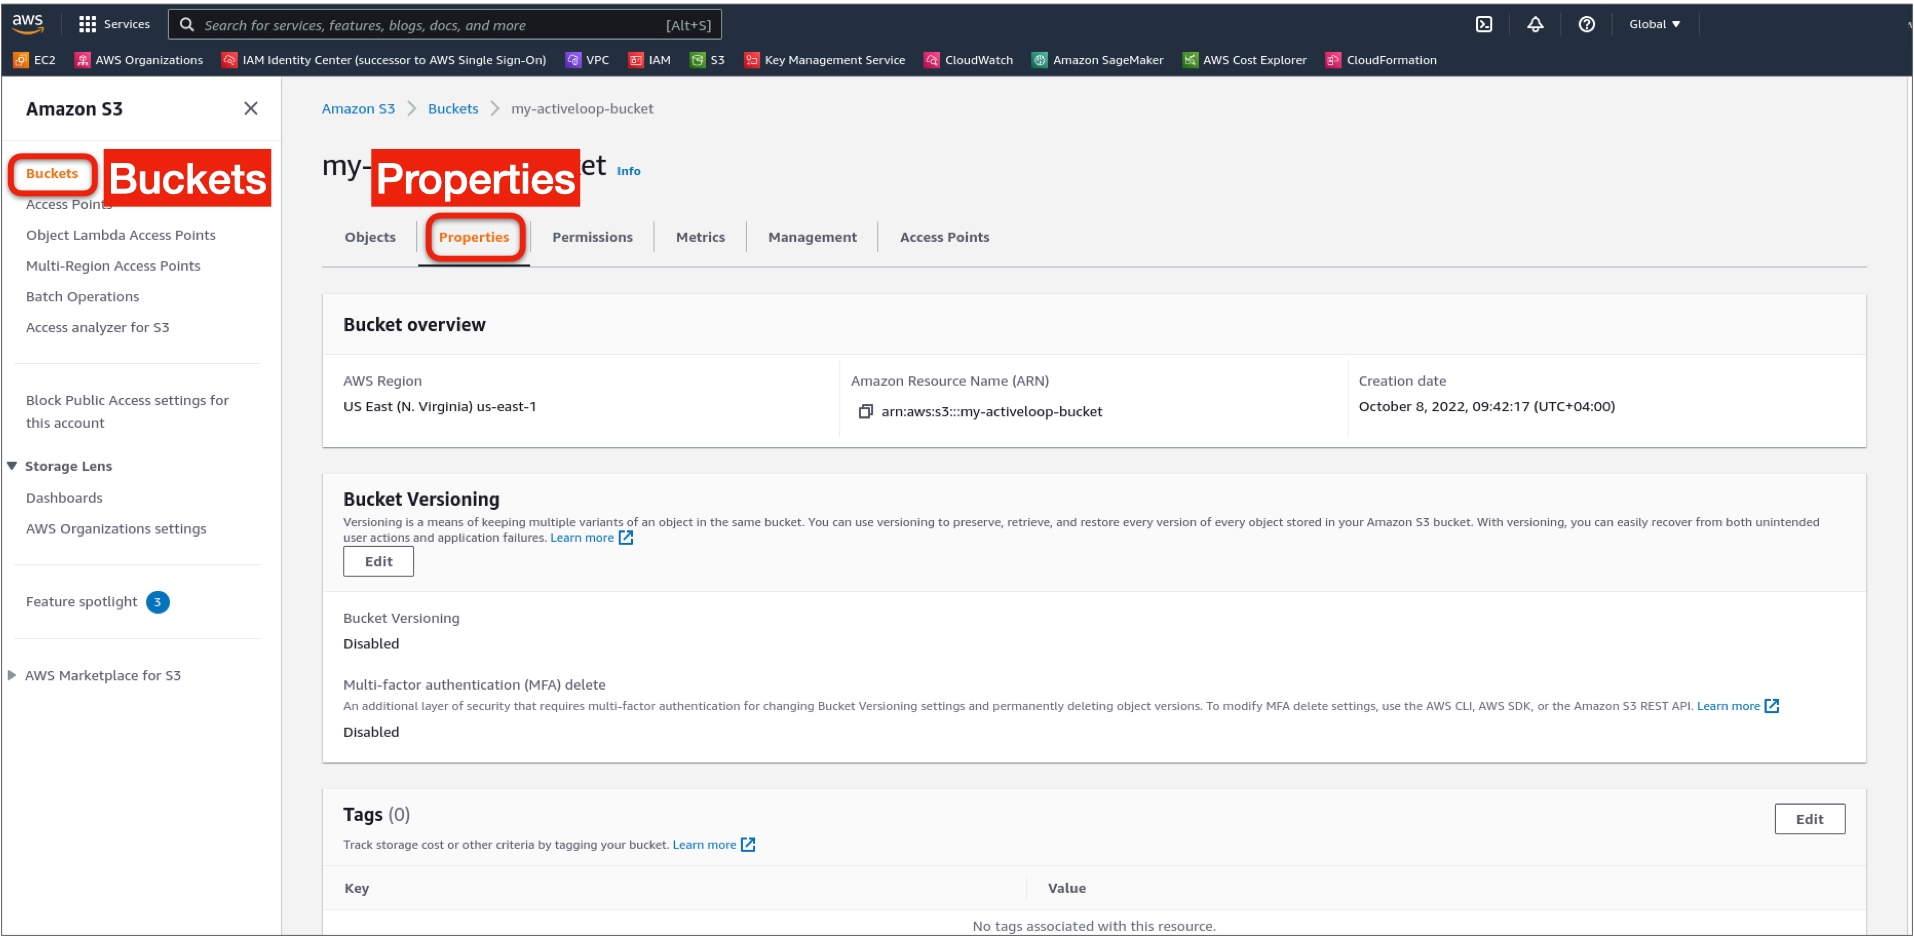
1. Navigate to the bucket in the AWS S3 UI
2. Open the bucket Properties
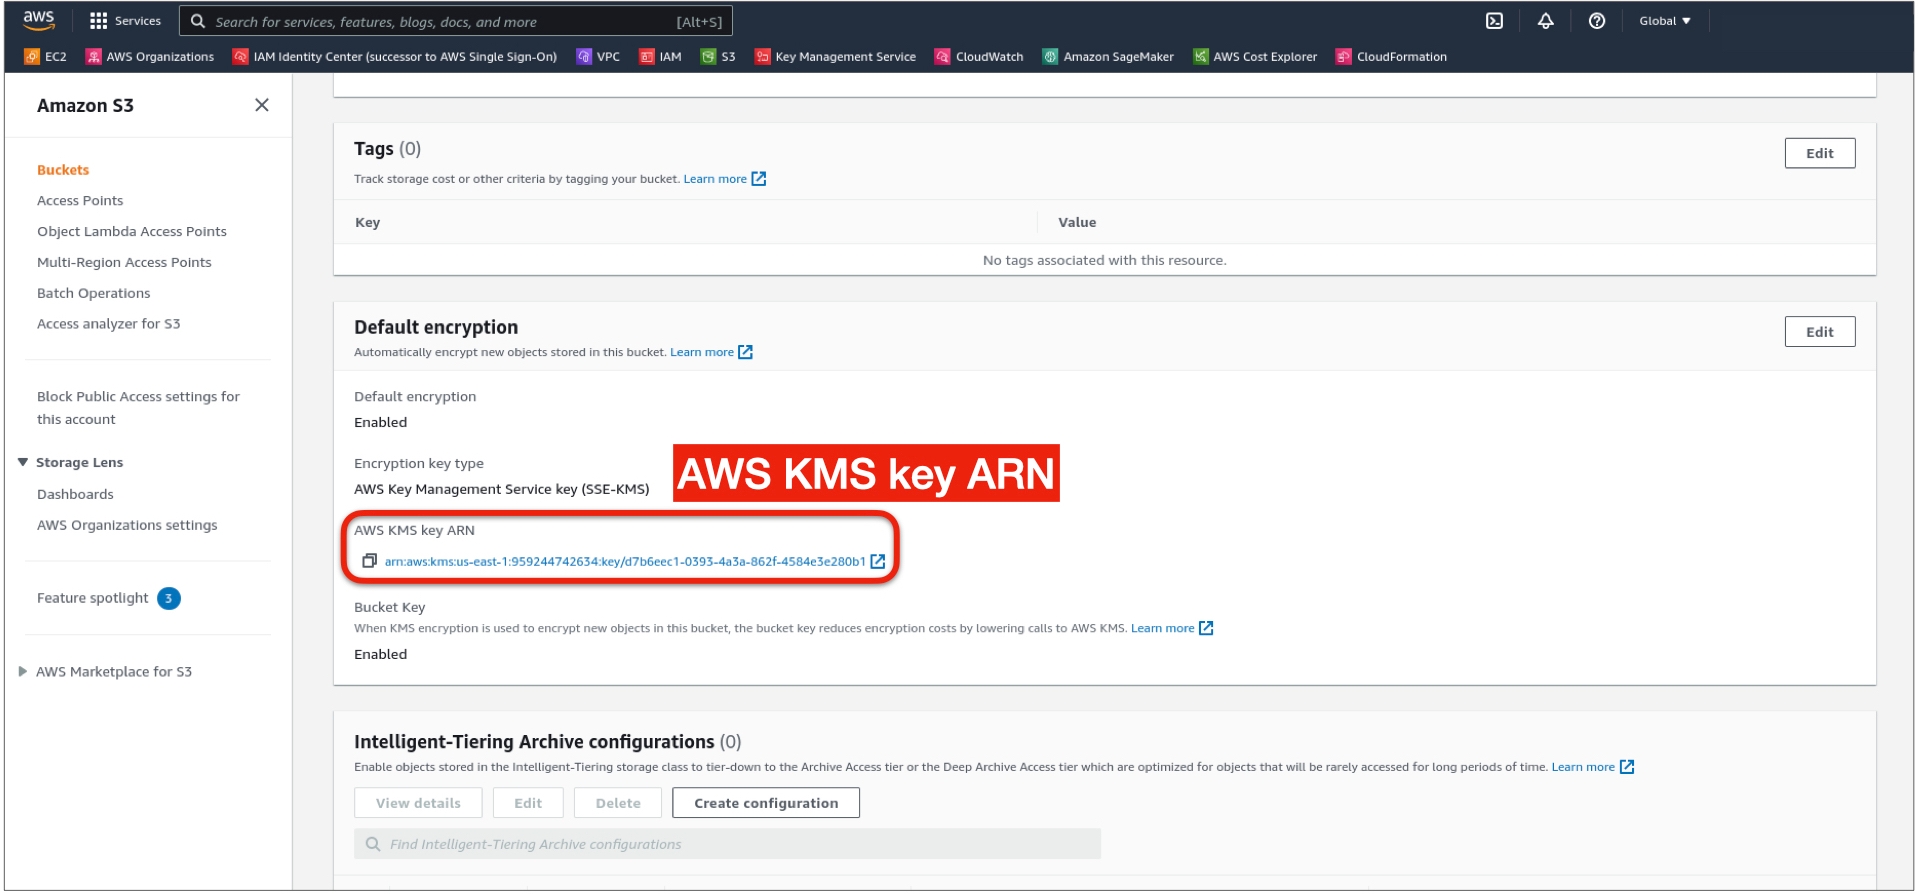
3. Scroll down to Default encryption and copy the AWS KMS key ARN
4. In the Policy creation step (Step 1, Sub-step 6), use the JSON below in the policy statement, and replace YOUR_KMS_KEY_ARN with the copied Key ARN for the encrypted bucket.
See the first video in the link below:
